Showing posts with label skirt. Show all posts

Saturday, 13 February 2016

Denim skirt

I've been eyeing up many denim skirts around at the moment, and 
decided to make one myself. A great way to wear a denim skirt can also be with a jumper tucked in to keep you toasty in winter.


This fabric was leftover from the bean bag I made a few posts back. Its quite a heavy black denim.


This pattern is one I took off a skirt I love... I used this skirt pattern for the bottom of my dungaree dress as well. When you know something works....why do anything different.


As well as the skirt the only other pieces I created were a strip for the waistband..which was strong enough not to be backed on anything. Then a strip for the button stand. Super easy.


I began by over locking all the edges around the skirt.


I then stitched the side seams together. 


I then stitched the first strip onto the front on the skirt, I made this quite wide, but that is something that can be altered. 


I then just turned up the hem the width of the over locking.


I then stitched the waistband on.


I top-stitched around the waistband and button stand to give it a more jean effect.


This is how I mark out button holes. I tend to put sewing machine needle in the top left hand corner and pull out the pins and slide them along so I know where the button hole starts and stops but I don't stitch over the pins. This is a good way of doing it without chalking the lines (which I tend to find I can't see very well)


Finished button holes.


I Found these lovely silver buttons which I think work great with this skirt.


All finished. I Absolutely love how this skirt works in winter too. I'm sure I will be able to wear it in summer too.


Monday, 5 October 2015

Invisible zip cheat


My most recent project is a little dungaree dress that I am making from mixing a pattern I took from a skirt and the top of a dungaree pattern. 

This is a little cheat which is super easy to do and great if you don't have a invisible zip to hand. 


I start by just putting in the zip as normal with the right sides together.


After this I pinned the fabric on the top with the edges pushed together 
(Image Below)


While it is still pinned I herringbone the zip to the fabric to keep it in place.


So simple and easy to do!!
My blog for the full dress will be coming soon xx

Monday, 17 August 2015

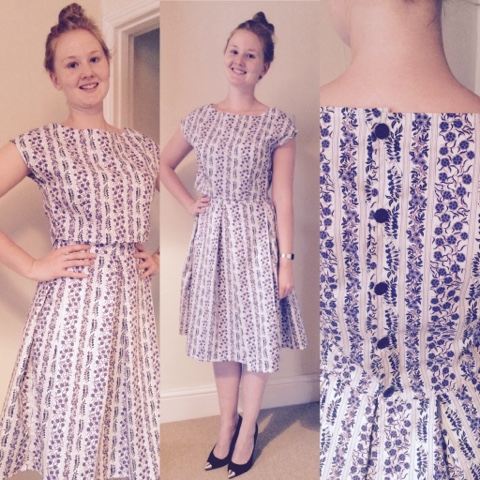
Floral Crop Top and Skirt


I have been making a few dresses recently, so I thought I would instead create a
crop top and matching skirt so I can wear them together and separately. 


I followed the shape of a previous dress that I cut up to use as a pattern. As I was
having a pleated skirt I just made a long strip for the skirt with n shaping. I cut a simple waistband with a backing fabric.


I began by stitch the back seam up the skirt to leave a 9" gap for poppers. I overlocked the top and bottom of the skirt, and then turned under the hem.


I overlocked the edges of the bodice and turned under the center backs.


I don't think this is an official placket but I personally think this is great way to get the effect of a placket. If you give the under lap of the seam a larger seam allowance it makes it a nice strip for the back opening to join to. like the image below.


For pleating I find it easiest to make the mannequin's waist the same as mine, and I pleat the fabric so it fits, 


After pleating I do a running stitch around the waistband to keep it in place before pinning the skirt onto the waistband.

I then stitch the waistband onto the front, turn over and hand stitch the back of the waistband down.


Stitching the button holes on down the back of the top.


All finished. 


Sunday, 1 February 2015

Finished ball gown


This was from my first lot of fittings with Jools, I made a couple alterations to the dress 
including adding two darts at the side and decreased the length of the bodice. 


During the fitting I marked up where the hem should be. To evenly mark this along the whole skirt
I put the mannequin on the table and created a little card board piece and measured the hem up from the table. 


I stitched the darts in and made alterations to the dress, I also made a small stop in the channel for the elastic so that she can pull the waist in more after she has put it on. 


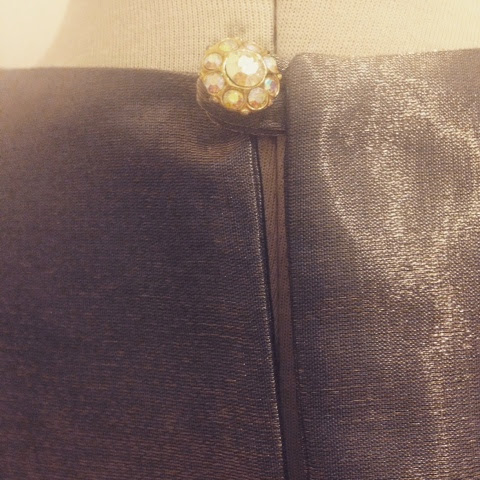
This is the back of the dress with a small slit and a nice sparkly jewel for a button. 


I am extremely pleased with this dress, I love the shape I think it is extremely classy and the fabric 
chosen has been fine to work with and looks lovely when it moves and the golden blue colour shines 
through. 


Sunday, 18 January 2015

Burgundy Ballgown


The project I am working on at the moment is a ballgown for my housemate 
I have used a vintage vogue pattern to begin with however, It has not yet been properly fitted to her and there might be a few alterations along the way. 


The Top half includes a fitted panel around the waist which I have backed 
and interfaced to make much stronger, to contrast this the halter neck is a loose gathered 
piece.


The Bodice and breast pieces are not stitched together at this point, the skirt is also separate.
I will have a fitting with my housemate before I go any further. 


Friday, 9 January 2015

Gingham Topshop Inspired skirt


This little skirt was inspired by a skirt that I saw in Topshop a while ago
however the skirt was £50 and I said to myself "I could just make that". 
Which I say quite often, however I went straight to a fabric shop and bought 3 metres of 
the fabric for just over £10. I didn't use a pattern for this skirt I just went ahead 
and box pleated the skirt using the checks on the fabric as a guide and popped it on a waistband. 

An afternoon and £40 better off, as you can see I was rather pleased with the outcome