Showing posts with label Top. Show all posts

Thursday, 11 February 2016

Top altering

This was just a quick little alteration for my sister before she went on her holidays.


This was quite a baggy top, As it has no fastening or opening anywhere I couldn't just take it in as then she wouldn't be able to pull it on over her head.

So I came up with the idea of creating some little bias ties that she could then tie to pull it in.


 I wanted it to blend in with the fabric of the top so I used some fabric I already had. 


I ironed it in half the turned each edges into the middle so I could run up a top stitch and keep it all inside.


I then unpicked the sides of the top and put the binding inside.


 I then stitched it in & stitched over it to keep it secure.


The finished result.. so simple and easy.


Monday, 31 August 2015

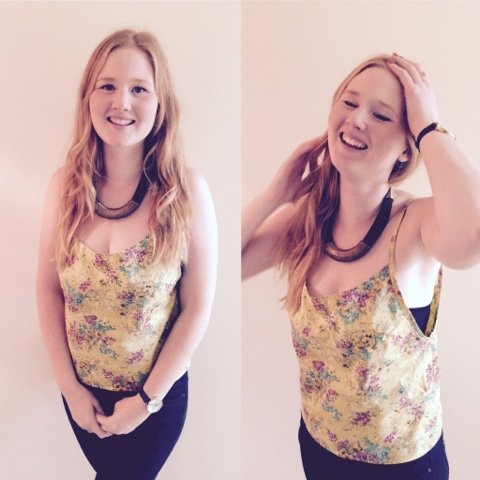
Floral Strappy Vintage Style Top


This is just a quick and easy top that I made using some vintage fabric. I loved the colour, making me excited for autumn. 


I started off with quite a small amount of fabric, I cut it into a square to begin with. 


I then marked up the areas I need to remove from the top including a dip in the front, back and also a drop for the arms. 


I then overlocked and stitched the side seams together, this image is what the top looked like before I 
created the bias binding and stitched that around the arm.


My arm hole is quite dropped so I wear it with a bandeau top underneath. The bias Is quite simple to do, I measured how much I would need by just putting the top on and wrapping the tape measure around where I wanted it.


I am really pleased with the out come of this. Lovely colours to wear in autumn with a big cardigan.


Monday, 17 August 2015

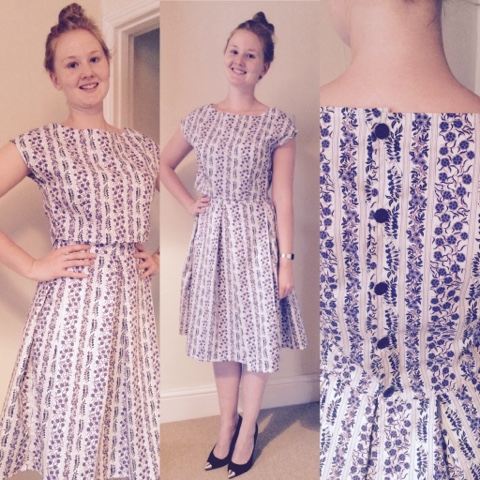
Floral Crop Top and Skirt


I have been making a few dresses recently, so I thought I would instead create a
crop top and matching skirt so I can wear them together and separately. 


I followed the shape of a previous dress that I cut up to use as a pattern. As I was
having a pleated skirt I just made a long strip for the skirt with n shaping. I cut a simple waistband with a backing fabric.


I began by stitch the back seam up the skirt to leave a 9" gap for poppers. I overlocked the top and bottom of the skirt, and then turned under the hem.


I overlocked the edges of the bodice and turned under the center backs.


I don't think this is an official placket but I personally think this is great way to get the effect of a placket. If you give the under lap of the seam a larger seam allowance it makes it a nice strip for the back opening to join to. like the image below.


For pleating I find it easiest to make the mannequin's waist the same as mine, and I pleat the fabric so it fits, 


After pleating I do a running stitch around the waistband to keep it in place before pinning the skirt onto the waistband.

I then stitch the waistband onto the front, turn over and hand stitch the back of the waistband down.


Stitching the button holes on down the back of the top.


All finished. 


Sunday, 18 January 2015

Burgundy Ballgown


The project I am working on at the moment is a ballgown for my housemate 
I have used a vintage vogue pattern to begin with however, It has not yet been properly fitted to her and there might be a few alterations along the way. 


The Top half includes a fitted panel around the waist which I have backed 
and interfaced to make much stronger, to contrast this the halter neck is a loose gathered 
piece.


The Bodice and breast pieces are not stitched together at this point, the skirt is also separate.
I will have a fitting with my housemate before I go any further. 


Sunday, 11 January 2015

Navy check top


This little number was created by using the pattern of the top half of the check dress,
which I just lengthened by a couple of inches, its a navy fabric with red overcheck.
The back of the top is done up with red buttons