Showing posts with label diy. Show all posts

Thursday, 11 February 2016

Cushion making


I'm not going to go into too much details about how I made this cushion 
as I'm sure most people have their own patterns and ways of doing things. This is just a little blog post so show you what I created and hopefully inspire you to make something yourself.


This was a very simple idea for a cushion for my granny. She loves lavender so using 
the free machine foot to create the simple picture seemed like a great personal idea. 


I hadn't used the free machine foot in a while .. I forget how much fun it can be.


Just a simple toggle fastening on the back is all I do. I sometimes I think zips can look a bit boring and this makes a statement of the fastening.
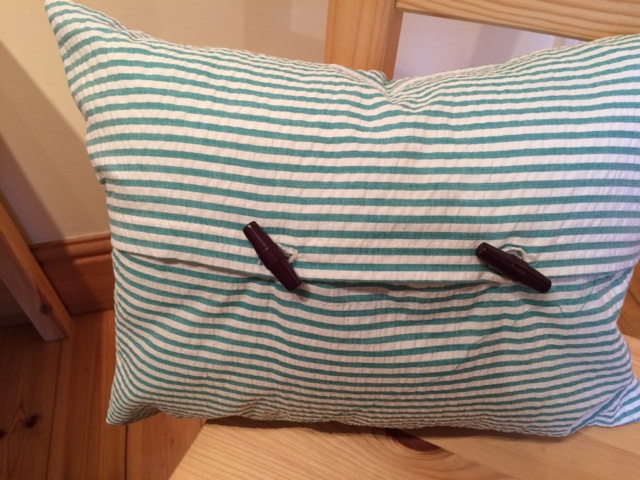

All ready to post... A great and easy present for someone you love... and you can make it as personalized as you want.

Monday, 16 November 2015

How to Alter your Jeans

Another Little job that has been waiting around for me to complete for a few weeks now was altering this pair of Topshop jeans.

These were a great pair of high waisted jeans, that over a few years lost quite a lot of stretch in the waistband. This led them to be super baggy and not very flattering to wear. I finally got round to doing it.

Here's how.


These are what the jeans loo like now. I wasn't going to take a picture of what they looked like before, not the most flattering. I began by separating the waistband from the legs about 3" long at each side seam. While wearing the jeans I pinned them to get an idea of how much I needed to take out.


I then transferred this through to the inside and pinned the line that I would sew.


As you can see here, after I stitched the side seams the waistband is much bigger than the legs. If you were altering something with a simple waistband that is easy to put on and off you could take the whole thing off, make it smaller and put it back on again. But with the button and button hole, I decided to alter the waistband instead (The lazy option!) 


I turned the waistband inside out and took the same amount out of it as did the side seams.


Before I stitched the waistband back on, I cut down and over-locked the extra seam allowance that I now had. 


I stitched the waistband back on.


Super easy and saves me having to buy a new pair of jean. Now I can finally wear these great jeans again.


Monday, 5 October 2015

Invisible zip cheat


My most recent project is a little dungaree dress that I am making from mixing a pattern I took from a skirt and the top of a dungaree pattern. 

This is a little cheat which is super easy to do and great if you don't have a invisible zip to hand. 


I start by just putting in the zip as normal with the right sides together.


After this I pinned the fabric on the top with the edges pushed together 
(Image Below)


While it is still pinned I herringbone the zip to the fabric to keep it in place.


So simple and easy to do!!
My blog for the full dress will be coming soon xx

Monday, 31 August 2015

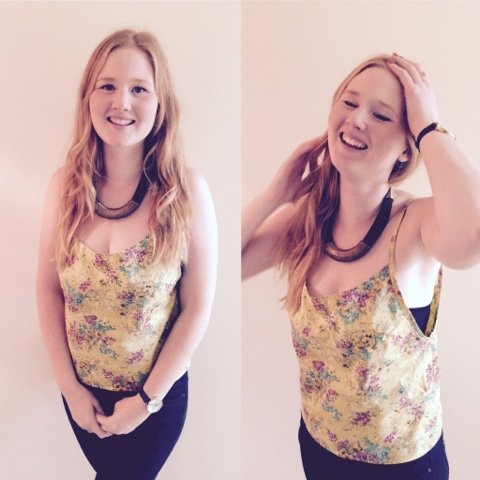
Floral Strappy Vintage Style Top


This is just a quick and easy top that I made using some vintage fabric. I loved the colour, making me excited for autumn. 


I started off with quite a small amount of fabric, I cut it into a square to begin with. 


I then marked up the areas I need to remove from the top including a dip in the front, back and also a drop for the arms. 


I then overlocked and stitched the side seams together, this image is what the top looked like before I 
created the bias binding and stitched that around the arm.


My arm hole is quite dropped so I wear it with a bandeau top underneath. The bias Is quite simple to do, I measured how much I would need by just putting the top on and wrapping the tape measure around where I wanted it.


I am really pleased with the out come of this. Lovely colours to wear in autumn with a big cardigan.


Monday, 17 August 2015

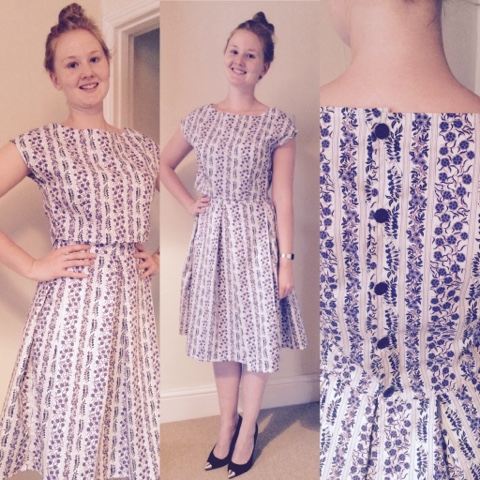
Floral Crop Top and Skirt


I have been making a few dresses recently, so I thought I would instead create a
crop top and matching skirt so I can wear them together and separately. 


I followed the shape of a previous dress that I cut up to use as a pattern. As I was
having a pleated skirt I just made a long strip for the skirt with n shaping. I cut a simple waistband with a backing fabric.


I began by stitch the back seam up the skirt to leave a 9" gap for poppers. I overlocked the top and bottom of the skirt, and then turned under the hem.


I overlocked the edges of the bodice and turned under the center backs.


I don't think this is an official placket but I personally think this is great way to get the effect of a placket. If you give the under lap of the seam a larger seam allowance it makes it a nice strip for the back opening to join to. like the image below.


For pleating I find it easiest to make the mannequin's waist the same as mine, and I pleat the fabric so it fits, 


After pleating I do a running stitch around the waistband to keep it in place before pinning the skirt onto the waistband.

I then stitch the waistband onto the front, turn over and hand stitch the back of the waistband down.


Stitching the button holes on down the back of the top.


All finished. 


Sunday, 21 June 2015

Making a quick peg bag


Just another thing I have had to make since moving into our new house. 

so a quick and easy way of creating a peg bag, I Drew around a hanger to get the right shape at the top
making it a little shorter and leaving space a the top. Making the back of the peg bag shorter than the front so that I can hem the opening and create a flap front.

After hemming the opening I stitched the top sides together leaving the top and the small edges, Then I stitched the bottom half over the top, leaving a small slip at the edge to squeeze the hanger through the edges. 


This is the end result nothing too fancy but it does the job.


Monday, 15 June 2015

Making a Bean bag


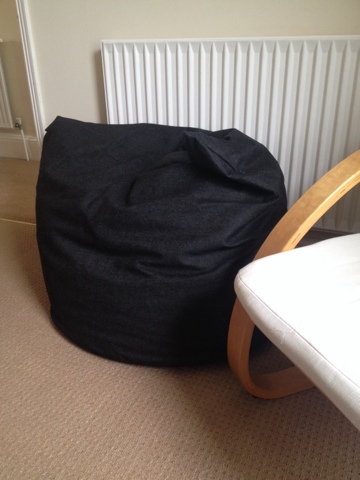
A little project I was asked to make, for my boyfriend's birthday was a Bean bag!

I created a simple pattern for this bean bag without any hassle. The fabric he chose 
was a heavy dark denim type. 

firstly I began by cutting out a large circle for the base of the bean bag. I created a circle with the diameter of around 60cm but this can be made smaller or larger.  


I then cut out a long strip of fabric to stitch around the edge of the circle to create the 
sides of the bean bag. i did the exact same thing on another fabric which is to sit inside the bean bag so that if the bean bag ever ripped the beans would not pour out. 


This was me collecting a very large bag of beans ready to pour inside


I used a few scraps of fabric to create the lining as it was just handy to get rid of fabric that I wasn't going to use. to actually fill the bean bag it would have been goo to stitch up the bean bag fully and use a funnel to pour them in, however i had to hang the bean bag off the edge of the bed and use a saucepan to scoop the beans in slowly. 

I then hand stitched the lining up I stitched it by hand first so no beans would get out then went over it with the machine to make it much sturdier. 


As you can see quite a few beans made it onto the floor :s

After I completed the inside I put the lining bag inside the outer bean bag and slip stitched the top of the fabric together.  


Another way would to be to add a second circle piece and fit it on top but 
I love the shape and style of this, It looks much more comfier and welcoming to sit on.


and Ta Dahhhhh !!! 


Sunday, 1 February 2015

Finished ball gown


This was from my first lot of fittings with Jools, I made a couple alterations to the dress 
including adding two darts at the side and decreased the length of the bodice. 


During the fitting I marked up where the hem should be. To evenly mark this along the whole skirt
I put the mannequin on the table and created a little card board piece and measured the hem up from the table. 


I stitched the darts in and made alterations to the dress, I also made a small stop in the channel for the elastic so that she can pull the waist in more after she has put it on. 


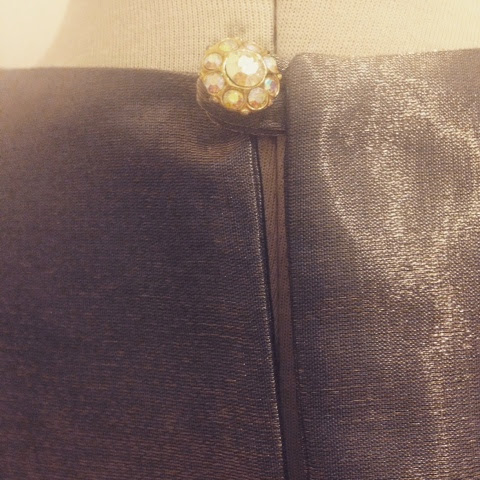
This is the back of the dress with a small slit and a nice sparkly jewel for a button. 


I am extremely pleased with this dress, I love the shape I think it is extremely classy and the fabric 
chosen has been fine to work with and looks lovely when it moves and the golden blue colour shines 
through.